Monday, December 12, 2011

Nutcracker Craft

Tracy and I were browsing on Pinterest for Christmas craft ideas that he could make for his family. 
We came across this blog that had a tutorial to make these West Elm nutcrackers


Out of Dollar Store nutcrackers...

Here is my version of the before


and after!


Now I just wish we had a mantle to display them! 

 What you'll need:
Nutcrackers-we got ours at the Dollar Tree $1 (they are 9 inches tall)
Spray paint-on hand (we ALWAYS have spray paint)
That's all!

It cost $5 for five nutcrackers
Much better than $29 for one!

Saturday, December 10, 2011

Ornament Christmas Tree

I've been crafting like crazy this holiday season, my latest craft is an ornament Christmas tree. Totally easy (seems to be a trend with the crafts I make...) and inexpensive, bonus!

What you'll need:
Foam Cone - I got mine at joanns in the floral section, I think it was around $5
A few packs of Christmas ornaments - I got two different sizes, I think I used about 2.5 packs of each size, The ornament packs were from the dollar store
Gold Star - Also from the dollar store
Hot glue gun - on hand


I always forget to take pictures before I start these projects but here is one during and the finished product


Pretty much I just shoved the top of the ornament into the cone and hot glued it in. I did one row at a time and made sure the ornaments fit well around the cone before I glued them in.


The green of the cone shows up a lot more in the photos than in real life...

Project total: about $12

Friday, December 9, 2011

Christmas Wish List

Here are a few items on my wish list for Christmas this year


and a couple stocking stuffer suggestions


Makeup

Victoria's Secret Gift Card

Pedicure


Wednesday, December 7, 2011

Christmas Countdown craft

I have always wanted to have a reusable advent calendar, but I've never found one that I love. So I  made one! It didn't cost too much to make but it was a little labor intensive. It has pockets for each day and I've put Christmas related activities in each day. I'm looking forward to this as a great way to start Holiday traditions.


Supplies:
Colored pieces of felt (I used 3 of each color; could be more or less depending on the size of the squares) -$.29 cents each
Scissors -on hand
Pre-cut felt numbers and letters (2 of each color) -$4.99 each
3/4 yard of red felt (for the background, I didn't even use half of that though) $2.50
Wooden stick -$.59 cents
White paint/Spray paint - on hand
Yarn -$2.79
Hot Glue (lots of it!) -on hand
Pins - on hand

I didn't really have a pattern or measure anything, but it looks good!
Here are some photos of the process.

First I put the number 25 on the felt and figured out what size I wanted the pockets to be.
I cut out all the squares using the initial squares that I cut and put the numbers on the pockets

Then I pinned the pockets onto the back squares and hot glued the three sides


Next I cut out the fabric for the back, again I kind of just eyeballed what size I would need.


With the extra letters from the pre-cut felt I decided to put "Christmas Countdown" on my calendar


I  cut down the stick to leave just a little extra on each side, painted it white and drilled holes on each side
Then I threaded the yarn through each side and tied it at the top


Finally finished, I hung it next to our tree!!

Tuesday, December 6, 2011

Work Holiday Party

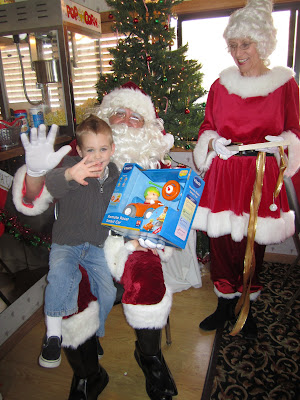
Over the weekend we had our work holiday party. We went on a boat cruise around Saguaro Lake and had lunch on the boat. Santa and Mrs. Claus came and Matix even got to steer the boat!


Captain Matix!!


Sunday, December 4, 2011

Monday, November 28, 2011

Zoo lights!

Over the weekend we went to the Phoenix Zoo to check out the zoo lights. It was a perfect night, it's still about 70* at night, but the lights helped put me in the Christmas spirit. It was really beautiful and amazing to see what they can do with lights.